

What Happens During the First Two Weeks of an Extension Build?
Starting an extension can feel like a big step. Even if you’ve done months of planning, approved drawings, and chosen a builder you trust, the first couple of weeks on site are when it all suddenly becomes very real.
Clients often ask what actually happens at the beginning of an extension. Why does it sometimes look like a lot of digging and not much building? Is everything going to plan if the garden looks upside down? And how long before walls start going up?
This guide walks you through exactly what usually happens during the first two weeks of an extension build, so you know what to expect, why each stage matters, and how it sets the foundations for the rest of the project.
Before Day One: Site Setup and Preparation
Although the build officially starts on day one, a lot of groundwork happens beforehand.
Before we arrive on site, we’ve usually already reviewed drawings, structural details, and building control requirements. We’ll also have checked access, waste removal arrangements, and where materials and skips can be positioned.
On the homeowner’s side, this is when gardens are cleared, sheds removed if needed, and internal spaces prepared if there’s a knock-through involved later. Clear communication at this stage helps everything run smoothly once work begins.
Day 1–2: Marking Out and Setting Levels
The first visible step is marking out the footprint of the extension.
Using the approved drawings, we set out the exact size and position of the new structure. This includes checking distances from boundaries, confirming wall lines, and establishing finished floor levels. Accuracy here is critical because any error at this stage carries through the rest of the build.
You might not see much progress in terms of height, but this stage ensures the extension sits exactly where it should and meets planning and building regulation requirements.
Day 2–5: Excavation for Foundations
Once everything is marked out, excavation begins.
This is often the noisiest and messiest part of the early build. Trenches are dug for the foundations, typically to a standard depth of around 900mm, although this can vary depending on ground conditions and building control requirements.
At this point, unexpected discoveries can sometimes appear, such as old drains, poor ground, or previously unknown services. If anything like this comes up, it’s assessed properly and discussed before moving forward.
This phase is one of the most important parts of any extension build because strong foundations are what support everything above.
Building Control Inspection of Foundations
Before any concrete is poured, building control must inspect the excavated trenches.
They’ll check depth, width, and ground conditions to make sure the foundations are suitable. If adjustments are needed, they’ll advise at this stage. Once approval is given, the build can move on without delays later.
This inspection is a key checkpoint and gives reassurance that the extension is being built correctly from the ground up.
Day 5–6: Pouring Concrete Foundations
After approval, concrete is poured into the foundation trenches.
This is a quick but crucial stage. The concrete provides the load-bearing base for the walls and structure above. Once poured, it needs time to cure properly before further work continues.
At this point, you may notice the site starts to look a bit tidier, even though it’s still very much a working area.
Day 6–8: Building Foundation Walls and Blockwork
With the concrete set, foundation walls are built up using blockwork.
These walls bring the structure up to damp-proof course level and create the base that the rest of the extension sits on. Damp-proof membranes are installed to protect against moisture rising into the building.
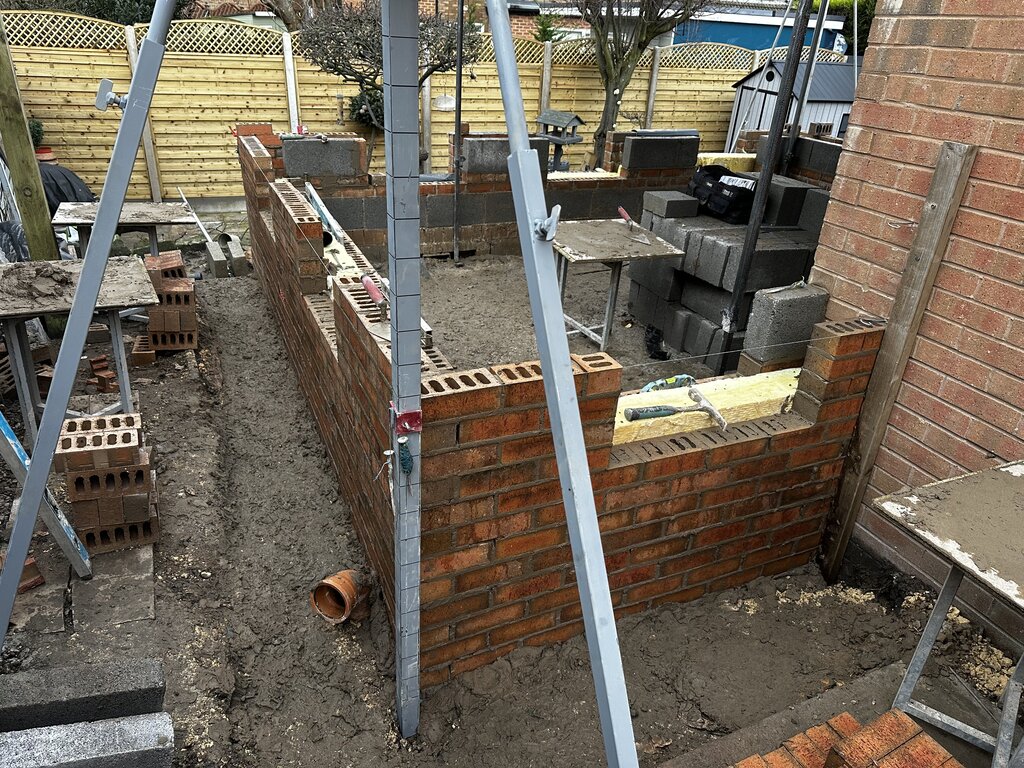
This is usually the first stage where homeowners feel like progress is really being made, as the outline of the extension becomes much more visible.
Drainage and Groundworks Coordination
During this phase, drainage is also addressed.
Existing drains may need to be connected into, adjusted, or protected depending on the design. New underground drainage runs are installed where required, such as for kitchens, utility rooms, or WCs.
Drainage work is carefully coordinated with building control to ensure everything complies with regulations and avoids future issues. It’s another critical step in the early stages of an extension build that’s best done properly the first time.
Day 8–10: Oversite Preparation and Floor Build-Up
Once the foundation walls are in place, attention turns to the floor area inside the extension.
The oversite is prepared by compacting hardcore, installing insulation, and laying damp-proof membranes. This creates a solid, insulated base ready for either a concrete slab or beam-and-block floor, depending on the specification.
Although this work is mostly below floor level, it plays a massive role in warmth, comfort, and long-term performance of the extension.
Day 10–12: Floor Slab or Beam and Block Installation
Next comes the installation of the actual floor structure.
For a concrete slab, this involves pouring and levelling concrete to the correct height. For beam and block floors, precast beams and concrete blocks are installed, followed by insulation.
Once this stage is complete, the extension finally has a solid floor to work from. This is often a psychological milestone for homeowners, as the space starts to feel real rather than just a building site.
Day 12–14: Starting External Walls
Toward the end of the second week, brickwork or blockwork for the external walls usually begins.
Depending on weather and site conditions, you may see the walls start to rise above ground level. Openings for doors and windows are formed, and the shape of the extension becomes much clearer.
This is the point where many clients say it finally feels like a proper extension build rather than groundwork.
Why the First Two Weeks Matter So Much
The early stages of an extension set the tone for everything that follows.
Good preparation, accurate setting out, proper foundations, and well-planned drainage all help prevent problems later. Rushing these steps can lead to delays, additional costs, or issues with building control down the line.
Although progress might feel slow at times, especially when a lot of work is happening below ground, these first two weeks are doing the heavy lifting for the rest of the project.
Common Questions Homeowners Ask Early On
Is it normal for the garden to look worse before it looks better?
Yes. Groundworks are disruptive by nature, but once foundations and drainage are complete, the site starts to tidy up quickly.
Why does it take so long before walls go up?
Everything above ground relies on what’s below it. Foundations, drainage, and floor structures must be correct before building upwards.
Should I be worried if something unexpected is found?
Not necessarily. Experienced builders expect occasional surprises and deal with them properly rather than ignoring them.
How Long Until the Extension Feels Livable?
After the first two weeks, progress usually becomes more visible week by week.
Walls rise, steels go in, roofs are built, and openings are formed. While it still takes time before the space is weather-tight and usable, the hardest groundwork is usually behind you by this point.
A well-managed extension build follows a logical sequence, and the early stages are all about setting things up correctly for the long term.
Final Thoughts
The first two weeks of an extension can feel disruptive, noisy, and a bit chaotic. But they’re also the most important phase of the entire project.
Understanding what’s happening on site helps manage expectations and gives peace of mind that the build is progressing properly. When done right, these early stages provide a solid base for everything that follows.
If you’re planning an extension and want clear communication, proper groundwork, and a build that’s done to regulations from day one, choosing the right builder makes all the difference.


